Currency
Language
 EN
EN
EN
FREE DELIVERY on all UK orders over £4.50 Find out more
EN
Reposted with permission of US Glove BLOG (www.usglove.com)
You have just got your new pair of handguards – what now?
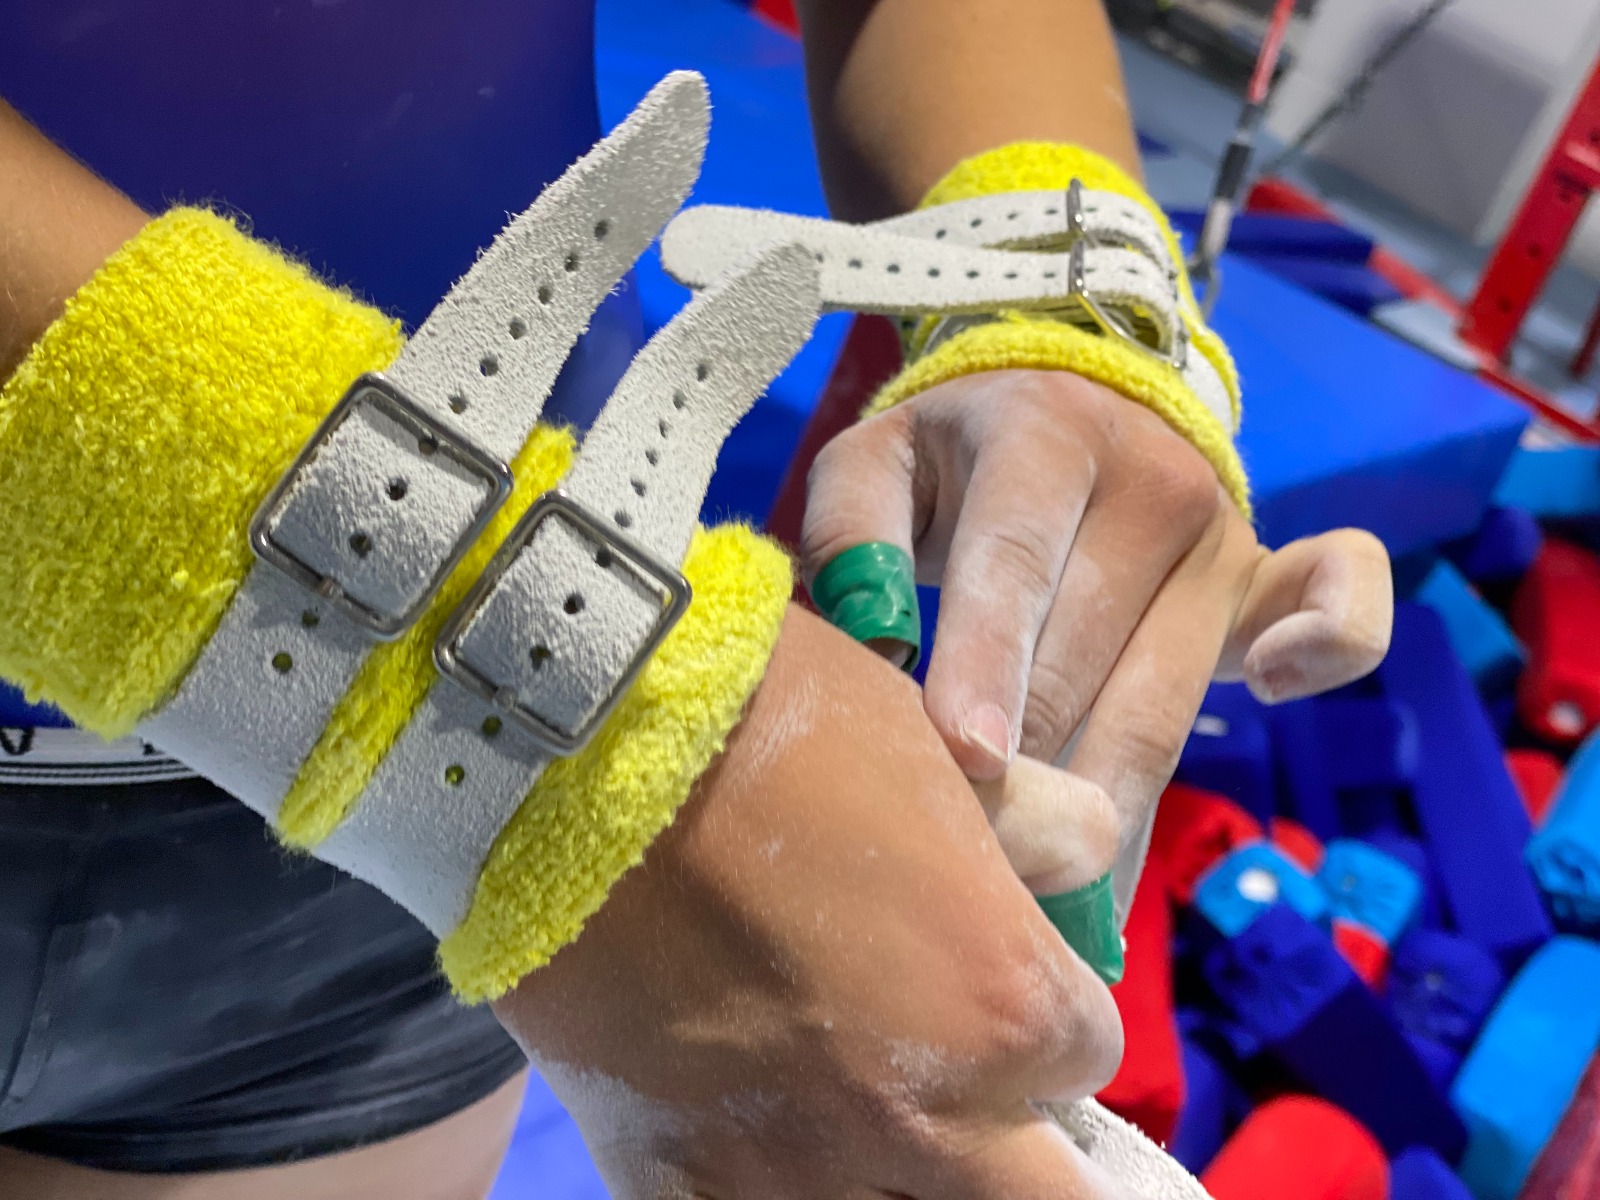
Once you have chosen your style of handguards (we will focus on dowel guards in this article), make sure they fit properly before you start breaking them in. They should be snug, and you shouldn’t be able to fully extend your hand with your new handguards on. They may feel a little too small at first, because the leather is stiff. That’s normal.
After you have determined that you have the right guard (grip) size, decide which guard will go on which hand. Then use a permanent marker to mark one with an L and the other with an R. Ladies handguards for asymmetric bars and Men’s Ring Guards are made uniformly for either hand, but once you break them in you can’t alternate. Men’s High Bar guards are usually produced with finger holes at an angle to the main body of the handguard. Your index finger should always be in the highest hole and your ring finger should go into the lowest hole.
We get it. You’re keen to start using your guards immediately. But, you can’t simply strap them on and start practicing. The leather on gymnastics guards can be stiff, and you will need to break them in to get the best and safest experience from your new guards.
There are plenty of recommendations for getting these important pieces of equipment broken in. But many of them are misguided and possibly harmful to your guards.
Follow these tips to get your gymnastics handguards broken in (without damaging them in the process).
- Start with the finger holes pointing upward and the dowel facing you.
- Wrap the leather around the dowel and roll the guard down to the cuff.
- Follow these same steps with the dowel pointing away from you. You’ll notice the leather is already softer.
- Repeat this same procedure on each handguard.
Note: never pinch the leather together at a sharp angle. This may damage it.
The above process should loosen and soften the finger holes. If it doesn’t, then use the following process:
- Get a small piece of sandpaper
- Repeatedly rub the pencil/sandpaper combo inside the finger holes, back and forth in a circular motion, to make the opening wider. This will uniformly make the holes bigger without tearing the leather. This process increases the size of the finger holes very quickly, so sand a little bit at a time and check the fit frequently.
- The finger holes should be very snug. They will continue to stretch with use.
Some people recommend using sharp objects to loosen the finger holes. Do not do this! Don’t stretch the holes by hooking or pulling on anything, and do not cut the holes to make them wider.
Shortcuts in the process will damage the leather and you’ll have to buy new guards.
Start slowly when you bring your new guards into the gym. Begin wearing your new guards for basic swings and gymnastic skills, or simply for warming up on the bars (rings), until they are broken in. Only when your guards feel more comfortable and broken in should you attempt more advanced or new skills. Always check with your coach to make sure you are ready.
New bar or ring guards take time to get used to and some effort to get broken in. Don’t get discouraged. Guards are essential for safety as you progress in gymnastics.
Once you get used to the guards and break them in, you’ll never want to be without your new best friends!
Do you have more questions? Check out our BLOG articles, or alternatively send us an email, or call us. We will be more than happy to help with all your gymnastic questions!
Please contact us on: 01322 384 003
Email: sales@gymnasticplanet.com
Instagram: @gymnasticplanet
 FR
FR UA
UA

